Tag: chocolate cake

Chocolate + Chocolate Chip Cookie Layer Cake

Chocolate + Chocolate Chip Cookie Layer Cake

We. Love. This. Cake. From the perfectly dense and moist and light and chocolatey cake, to the layer of a huge chocolate chip cookie right in the middle, to the thick and rich brown sugar buttercream – this cake has it all. Now it does 

Triple Chocolate Mousse Cake

Triple Chocolate Mousse Cake

But, I am not sure I will ever be able to top this dessert though. This Chocolate Mousse cake is rich and decadent and sweet and moist and just perfect! Start with a mousse-like flour-less cake, top with a rich chocolate mousse, and finish the whole thing off with a white chocolate/peanut butter mousse. Throw on some extra chocolate shavings and you are in Cake Heaven!!

Chocolate (Mocha) Ice Cream Cake

Chocolate (Mocha) Ice Cream Cake

It’s Celebration Time!!

My Dad’s Birthday was last week and Ice Cream Cake (the kind with real cake and without those little crunchy things) is one of his favorites – that and the Chocolate Mocha Cake that I  made for his retirement.

Dad’s birthday should (and is) reason enough to celebrate – but we have another reason to celebrate here at Teacher by Day – Chef by Night!
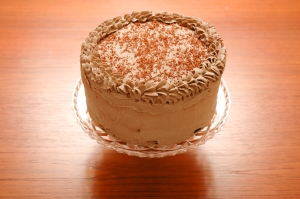
One year ago: August 17, 2010 I posted my very first blog post. I have come so far in this year… taking the plunge getting pictures posted on FoodGawker, gaining readers, being willing to experiment more, and the list goes on.
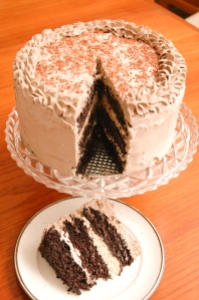
Now I have to look to the next year! In the next year I hope to continue to get images posted on FoodGawker, increase my readership, gain sponsors, get my own URL, and most of all continue to experiment & have fun in my kitchen!

While we reflect on my goals and look forward to the year ahead, I give you:

Ice Cream Cake

Chocolate Cake

cake from my Chocolate Peanut Butter Layer Celebration cake, originally found on Sugar Cooking.
  • 2 cups all-purpose flour
  • 2 1/2 cups sugar
  • 3/4 cup unsweetened cocoa powder
  • 2 teaspoons baking soda
  • 1 teaspoon salt
  • 1 cup neutral vegetable oil
  • 1 cup sour cream
  • 1 1/2 cups water
  • 2 tablespoons distilled white vinegar
  • 1 teaspoon vanilla extract
  • 2 eggs

Preheat the oven to 350 degrees F. Butter the bottoms and sides of three 8-inch round cake pans. Line the bottom of each pan with a round of parchment or waxed paper and butter the paper (do not skip the paper on the pans).

Sift the flour, sugar, cocoa powder, baking soda, and salt into a large bowl. Whisk to combine them well. Add the oil and sour cream and whisk to blend. Gradually beat in the water. Blend in the vinegar and vanilla. Whisk in the eggs and beat until well blended. Scrape down the sides of the bowl and be sure the batter is well mixed. Divide among the 3 prepared cake pans.

Bake for 30 to 35 minutes, or until a cake tester or wooden toothpick inserted in the center comes out almost clean. Let cool in the pans for about 20 minutes. Invert onto wire racks, carefully peel off the paper liners, and let cool completely & then freeze overnight or at least 2 hours to proceed with the cake.

Ice Cream

I just used Store-Bought, you could make you own if you were feeling up to it! I used about 1/2 of a gallon – it was not quite enough, you should should at least 3/4 of a gallon or go all out and use the whole gallon! The better the quality Ice Cream you use the better your cake will be (look for the full-fat ones without additives like gum – the best ice cream is either homemade or made with just cream/sugar/eggs)

We were going for Mocha Cake so I used a layer of Coffee and a layer of Vanilla Ice Cream (so Mom could sleep and she just skipped on the Coffee). This would be awesome with whatever flavor Ice Cream you love (chocolate, mint chocolate chip, vanilla banana, etc)

Frosting

Mocha Whipped Cream Frosting

  • 1 pint Whipping Cream
  • 2 Tablespoons Instant Coffee (I used Decaf)
  • 2 Tablespoons Cocoa Powder
  • 3 Tablespoons (?) Sugar

Put your heavy cream into your mixer. Allow to get thick, then add your coffee/cocoa. Combine that fully. Once your Whipped Cream is almost thick – add your sugar. TASTE at this point and see what you think – add more sugar if you want it sweeter. Allow your whipped cream to get nice and thick with stiff peaks.

Assembly

Bake Layers, Allow to Cool (completely – freeze for at 2 hours after they are cooled to help them firm up as well). When you put your layers in the freezer, wrapping each one in saran individually will allow for assembly to be the easiest. Also – make sure you have room in the freezer to stack all of these with a little wiggle room all around so there is a ‘safety zone’ once it is frosted!

Take your ice cream out of the freezer about 10 minute before you are ready to start. You want to put it into a seperate bowl so you can smoosh it around to make it smooth and ready to spread. Once you have a thick/spreadable Ice Cream take out your layers and place one on your cake platter (or your cardboard cake thing or whatever you make your cake on – I personally love to use the bottom of my springform pan!). Spread your ice cream onto the cake & top with another layer, pushing down to make it flat. Return to the freezer

About an hour later – repeat with the next layer of ice cream and top with your 3rd cake layer. Return this to the Freezer again. (now is a good time to make the whipped cream)

Take out your cake & ice it (haha – you are icing and ice cream cake!). I iced my cake in two steps, about 1/3 of the icing in a “crumb coat” but since it was frozen it didn’t really need it. Allowing the icing to set up for about 20 minutes in the freezer allowed me to get a much smoother top coat of my whipped cream on the cake. I top with some shaved chocolate, allowed to set again and then finally just piped some more whipped cream around the edge.

This cake is worth the time/effort that goes into it!

I hope that you have enjoyed my first year of blogging as much as I have – and if you are just visiting for the first time, I hope that you stick around and help me see where the next year will take us!

And I leave you with a Question… What suggestions/advice do you have for me as I enter my 2nd year with this blog?

Chocolate Mocha Cake

Chocolate Mocha Cake

A few years ago my aunt gave me Death by Chocolate Cakes – and wow is there good stuff in there (great cookbook for those chocolate addicts – get it, seriously), so I knew thats where I had to go to find this cake (which I had sticky-noted immediately after receiving the book).

Chocolate Mug Cake

Chocolate Mug Cake

This is the make at home, do it yourself, whatever, whenever, whoever, version of those ‘instant’ cakes and they are just TOO GOOD! You are now just 10 minutes from warm Chocolate Cake

Chocolate Cake Cheesecake

Chocolate Cake Cheesecake

ITS RICH’S BIRTHDAY!

Chocolate Cheesecake Cake - layers in motion

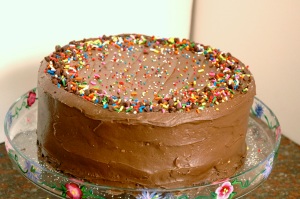
The is just one problem with loving to cook, starting a food blog, improving your cooking skills, and dating someone who loves to eat my cooking. That is: when I offer the world for his birthday, he decided to take it and challenge me to get an awesome birthday cake this year. I love a challenge, so was ready to try making Chocolate Cake Cheesecake (you know kinda like the Cheesecake Factory’s classic dessert) when that was what Rich requested. After some Foodgawker searching I found Erin’s Food Files version that she recently made and decided I was up for this birthday challenge. Since last weekend I made a chocolate-peanut butter cake (and Rich didn’t want a peanut butter frosting) I decided to search for a different frosting (Rich requested a fudge-like chocolate frosting) and decided to roughly base my frosting on Beantown Baker’s Chocolate Frosting.

pre-frosted cake or oversized Oreo!?

cake plate hand-painted by my wonderfully talented Aunt Pat

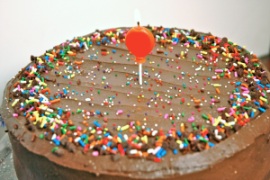
Be sure to set aside some time (cheesecake the day before) to make this cake – but once all of your parts are ready it is a fast assembly! The cheesecake layer is nice and smooth not a super solid cheesecake so it fits perfectly with the soft layers of the cake. Feel free to decorate however you want (I went with sprinkles since it was a birthday!) and just enjoy this cake for a special occasion [or whatever].

Happy Birthday Rich

RECIPE

Recipes adapted from Erin’s Food Files & Beantown Baker

CHEESECAKE:

  • 1 1/4 pounds bar cream cheese (20 oz), room temperature
  • 3/4 cups sugar
  • 1/2 tablespoon vanilla extract
  • 1/4 teaspoon coarse salt
  • 2 large eggs
  • 1/2 cup sour cream

Preheat oven to 325 degrees. Boil a pot of water. Using an electric mixer, beat cream cheese on medium until fluffy, scraping down side of bowl. Gradually add sugar, beating until fluffy. Beat in vanilla extract and salt. Beat in eggs, one at a time, scraping down side of bowl after each addition. Beat in sour cream.

Cut parchment paper in a circle and line the bottom of the cheesecake pan. Wrap bottom half of pan in foil. Pour in filling; place in a roasting pan. Pour in boiling water to come halfway up side of springform. Bake until just set in center, about 45 minutes. Remove pan from water; let cool 20 minutes. Run a paring knife around edge; let cool completely. Cover; chill overnight, then on day 2 take out of the springform (leaving bottom on) and wrap in plastic wrap and freeze.

CAKE:

  • Butter, for greasing the pans
  • 1 3/4 cups all-purpose flour [plus more for pans]
  • 2 cups sugar
  • 3/4 cups good cocoa powder
  • 2 teaspoons baking soda
  • 1 teaspoon baking powder
  • 1 teaspoon kosher salt
  • 1 cup buttermilk, shaken
  • 1/2 cup vegetable oil
  • 2 extra-large or large eggs, at room temperature
  • 1 teaspoon pure vanilla extract
  • 1 cup freshly brewed hot coffee OR Guinness warmed up (since Rich loves our Guinness cake but it not a coffee drinker)

Preheat the oven to 350 degrees F. Butter 2 (9-inch) round cake pans. Line with parchment paper, then butter and flour the pans.

Sift the flour, sugar, cocoa, baking soda, baking powder, and salt into the bowl of an electric mixer fitted with a paddle attachment and mix on low speed until combined. In another bowl, combine the buttermilk, oil, eggs, and vanilla. With the mixer on low speed, slowly add the wet ingredients to the dry. With mixer still on low, add the coffee and stir just to combine, scraping the bottom of the bowl with a rubber spatula. Pour the batter into the prepared pans and bake for 35 to 40 minutes, until a cake tester comes out clean. Cool in the pans for 30 minutes, then turn them out onto a cooling rack and cool completely.

FROSTING:

  • 8 Tbsp butter (1 stick)
  • 4 oz cream cheese (1/2 a block)
  • 2 tsp vanilla extract
  • 4 cups powdered sugar
  • 1/2 cup dark cocoa powder
  • 1/3 cup milk (or Baileys) – I did a 50/50 mix & used Vanilla Almond Milk

Cream butter and cream cheese and vanilla. In a separate bowl, combine powdered sugar and cocoa powder. Add dry ingredients to creamed mixture. Slowly add milk until frosting reaches desired consistency, then beat another 5 minutes until creamy.

ASSEMBLY
Place first layer of cake on cake stand. If desired, frost with a little frosting. Remove cheesecake from freezer, unwrap, and remove from metal bottom of the pan, then be sure to peel off parchment paper. Place cheesecake layer on top of the cake. If the cheesecake is wider than the cake & its necessary to to trim it, wait approximately 10 minutes for the cheesecake to soften, then trim it with a knife. Place top layer of cake on top of the cheesecake, and coat with a layer of frosting (crumb coat). Refrigerate approximately 30 minutes, then frost the remaining frosting. Top with shaved chocolate, chocolate chips, or decoration of your choosing. Refrigerate until ready to serve.

... make a wish